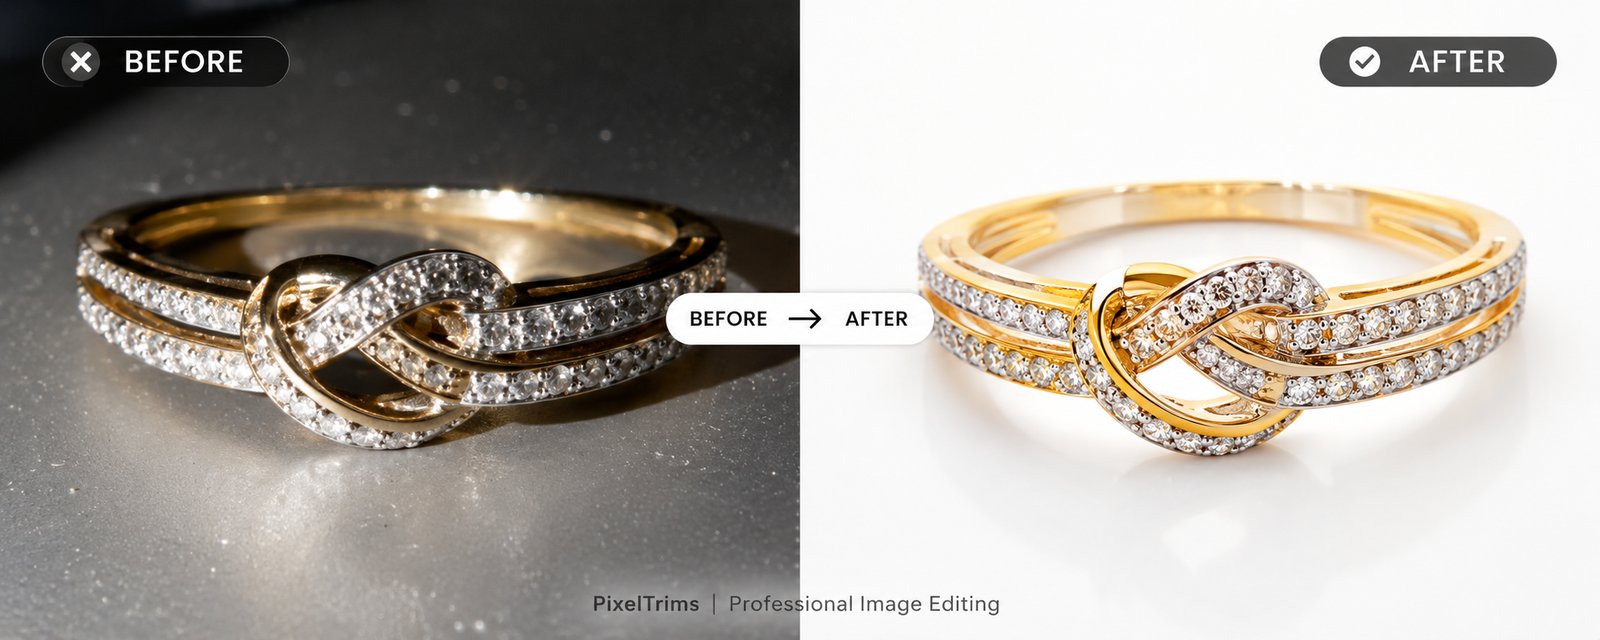
Most jewelry editing costs come from problems that were baked into the shot before the photo ever reached an editor. Dust that could've been wiped off, a hotspot that could've been diffused, a shadow angle that doesn't match the rest of the catalog — every one of these turns a 10-minute retouch into a 40-minute one. If you're shooting jewelry yourself (or briefing a photographer), a few setup habits at the shoot stage save real time and money downstream.
Why Shoot Quality Changes Your Editing Bill
Jewelry is the least forgiving product category to retouch — we've covered why jewelry photos are so unforgiving to edit in detail. The short version: facet-level detail means editors can't take shortcuts, so every avoidable flaw in the raw shot becomes billable editing time. Get the shoot right, and your jewelry retouching cost drops because there's simply less to fix.
Lighting Setup
Use diffused, not direct, light
A bare light source — even a decent LED panel — creates hard reflections on polished metal and faceted stones. Run your light through a diffuser (a softbox, a light tent, or even parchment paper taped over a window) before it hits the piece. Diffused light wraps around curves and facets instead of blasting a single hotspot into the middle of the frame.
Light from two angles, not one
A single light source leaves one side of a ring or pendant in shadow, which editors then have to brighten and blend manually. Two diffused sources at roughly 45 degrees on either side of the piece even out the exposure and cut down on shadow-correction work later.
Avoid mixing light temperatures
Shooting under a mix of daylight from a window and a warm LED panel creates a color cast that's hard to correct evenly across a piece with multiple materials (gold setting, white diamond, colored stone). Stick to one light temperature per shoot, ideally a daylight-balanced 5000–5600K source.
Background and Setup
Give the piece room to breathe
Place jewelry at least a foot in front of the backdrop, not flush against it. This separation lets natural shadow fall off cleanly and makes clipping-path work faster and cleaner — the piece has a visible edge instead of blending into the background.
Use a plain, seamless backdrop
White or light gray seamless paper is easiest to clip and matches most marketplace background requirements out of the box — see our pure white background guide for what "compliant" actually means pixel-wise. Textured or patterned backgrounds look nice in a lifestyle shot but add significant time to any background-removal or masking pass.
Keep a mannequin bust or riser consistent across a shoot
If you're shooting necklaces or earrings on a bust or riser, use the same one for the whole catalog. Switching risers mid-shoot is one of the most common causes of "why does this listing look different from the others" — something we flagged as a broader issue in common product photography mistakes that make editing harder.
Camera Settings That Actually Matter
- Use a tripod. Macro jewelry shots have almost no room for handheld blur — even a slight shake softens the exact detail buyers zoom in to check.
- Shoot at f/8–f/11. Wide apertures throw part of a ring or pendant out of focus; a narrower aperture keeps the whole piece sharp.
- Use a macro lens or extension tube. A standard lens can't get close enough to fill the frame the way jewelry listings need without heavy cropping, which softens detail.
- Trigger with a remote or timer. Pressing the shutter button by hand introduces just enough shake to matter at this scale.
- Shoot RAW, not JPEG. RAW files hold far more color and highlight information, which matters a lot when an editor needs to correct gold-vs-white-gold color accuracy.
Shooting for Catalog Consistency
If you're shooting more than a handful of SKUs, lock your setup before you start: same light position, same camera height, same distance from the backdrop, same white balance. Write the settings down or save a camera preset. A catalog shot with a locked setup takes an editor a fraction of the time to batch-process compared to a catalog where every piece was lit slightly differently.
What to Still Leave to a Professional Editor
Even a well-shot piece usually needs some finishing work — facet-level dust removal, precise color correction against a reference swatch, and shadow/background consistency across the full catalog. A clean shoot just means that work goes faster and costs less, not that it disappears entirely. See our breakdown of what jewelry retouching actually costs to budget accordingly, or check what a clipping path actually is if you're new to how background removal works on reflective, faceted items.
Want a second opinion on your setup before you shoot a full catalog? Send us two sample shots and we'll do a free trial edit — you'll see exactly how much (or how little) needs fixing.
FAQ
What's the biggest lighting mistake in jewelry photography?
Using a single, undiffused light source. It creates hard hotspots on metal and stones and leaves one side of the piece underexposed, both of which take significant manual retouching to fix.
Do I need a macro lens to shoot jewelry?
You don't strictly need one, but without a macro lens or extension tube you'll need to crop in heavily during editing, which softens detail. A macro lens lets you fill the frame at full sharpness straight out of the camera.
Why does my jewelry look a different color than the actual piece?
Usually a white balance mismatch — often from mixing light temperatures (like daylight plus a warm LED) or not shooting RAW. Lock one light temperature per shoot and shoot RAW so an editor has enough color data to correct accurately.
Does better shooting actually lower editing costs?
Yes. Editors bill largely on how much correction a piece needs. A clean, well-lit, consistently shot photo needs less dust removal, less shadow correction, and less color grading than a rushed handheld shot — which directly reduces per-image editing time.
What background should I shoot jewelry on?
Plain white or light gray seamless paper, with the piece placed at least a foot in front of the backdrop. This is easiest to clip cleanly and matches most marketplace pure-white-background requirements.
Tags
Ready to get your images edited?
Upload 2 photos for a free trial edit — returned in under 24 hours.
Start free trial →