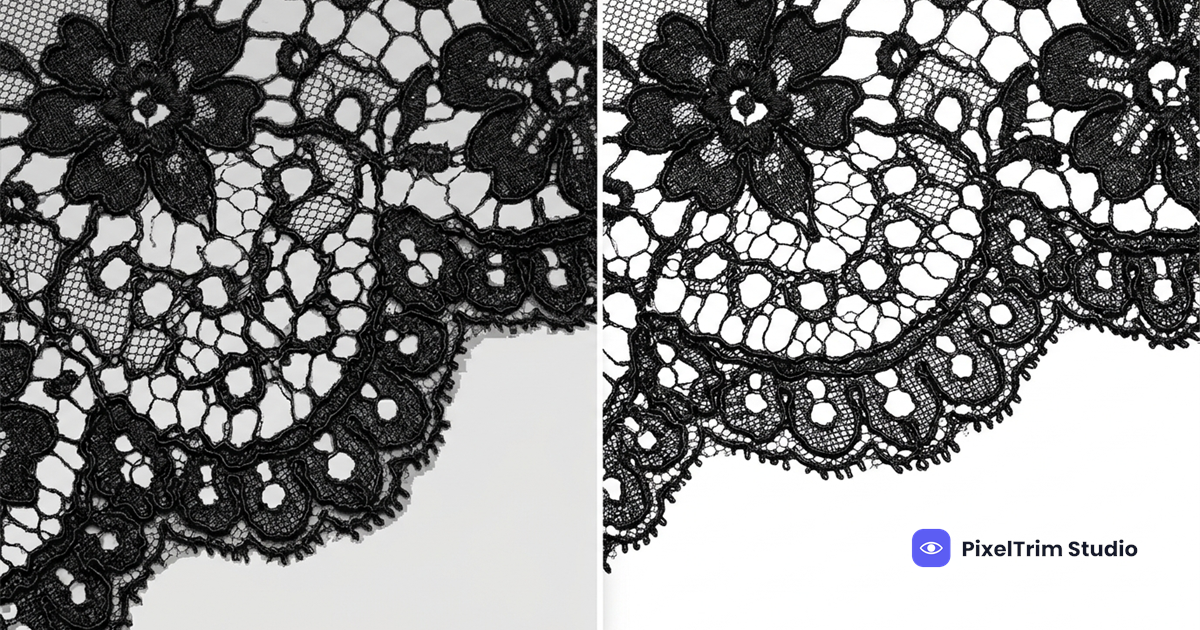
If you sell bridalwear, lingerie, evening gowns, or modern athletic sneakers with breathable mesh panels, you already know the sinking feeling of opening a batch of delivered cutouts. Where there should be delicate, open perforations, you find solid grey patches. Where soft, feathered lace should blend naturally into pure white, you see jagged, saw-toothed outlines that look like they were cut out with safety scissors.
Delicate textiles like Chantilly lace, fine tulle, and nylon micro-mesh are the ultimate stress test for background removal. Standard methods simply cannot handle them. When an editor treats a sheer fabric like a solid leather handbag, the product immediately loses its luxury appeal and looks stiff, cheap, and unnatural.
In this guide, we break down why standard tools fail on intricate fabrics, how professional retouchers use channel masking to preserve natural transparency, what to look for before approving a batch, and realistic studio pricing.
The Three Cutout Traps That Ruin Delicate Fabrics
Most commercial background removal relies on either vector paths (the Photoshop Pen Tool) or automated neural network background removers. While both work brilliantly on solid items, translucent and perforated textiles trigger three distinct failure modes.
1. The Cardboard Cutout Trap (Hard Vector Paths)
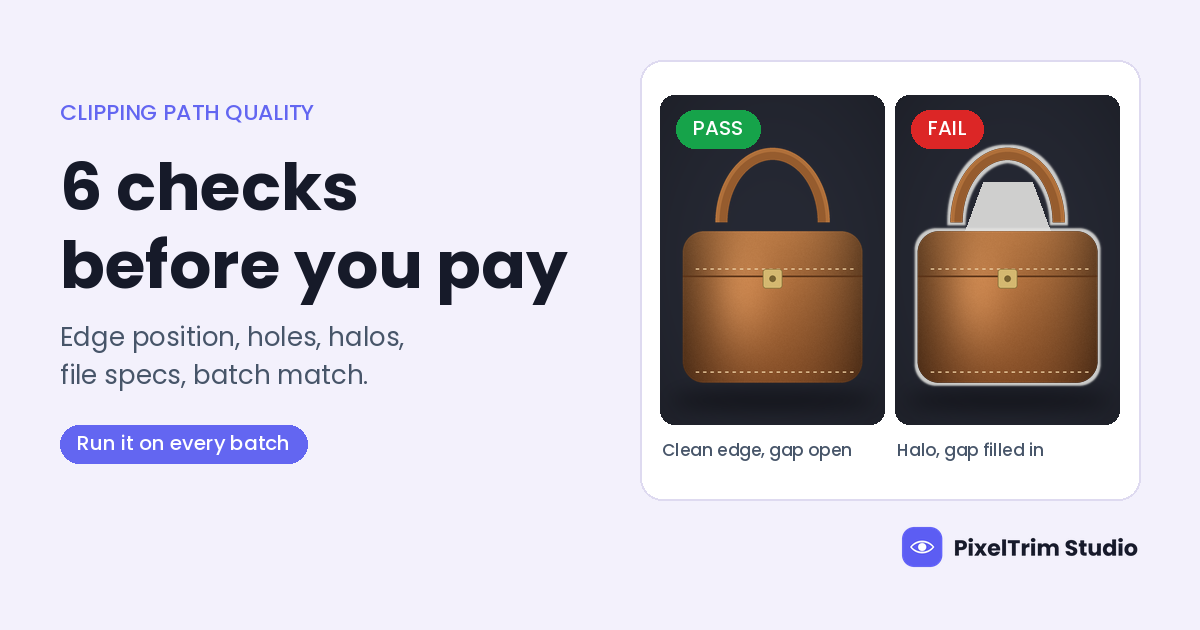
A vector clipping path creates a hard, binary boundary: pixels inside the line are kept at 100% opacity, while pixels outside are deleted completely. On a pair of sunglasses or a ceramic mug, that crisp line looks sharp. On a lace bridal veil, a hard vector path draws a perimeter around the fabric and skips the thousands of tiny holes inside the weave. The result is a solid, opaque mass that looks like stiff cardboard rather than flowing lace.
2. The Ghost Halo Trap (Color Contamination)
When you photograph semi-transparent lace or mesh against a grey, wooden, or colored studio backdrop, light passes through the individual threads and bounces into the camera sensor. If an automated tool merely cuts around the silhouette, the original backdrop color remains trapped inside the semi-translucent fibers. When placed on an Amazon-compliant pure white backdrop, the garment develops a muddy, discolored "fringe halo" that makes the edges look dirty. For a deeper look at fringe issues, see our guide on fixing white halos around cutouts.
3. The Disappearing Weave Trap (Over-Aggressive Contrast)
When automated AI background removers try to solve the fringe problem, they crank up contrast thresholds to force a clean edge. Instead of isolating the threads, the algorithm mistakes fine lace borders or translucent tulle layers for background noise and deletes them entirely. Your customer sees missing borders, chewed-up hems, and disconnected floating threads.
Technique Comparison: Pen Tool vs. AI vs. Layer & Channel Masking
Understanding which technique your editing partner uses is the key to getting catalog-ready cutouts without endless revision cycles.
| Editing Technique | Handling of Micro-Holes | Edge Transition | Alpha Transparency | Best Used For |
|---|---|---|---|---|
| Clipping Path (Pen Tool) | Manual paths required for each hole (slow/rigid) | Hard, 1-pixel vector line | None (0% or 100% opacity only) | Solid leather, plastic, metal, hard soles |
| Automated / 1-Click AI | Blurs holes into solid grey patches | Feathered or jagged blur | Inconsistent, leaves heavy fringing | Draft mockups, simple flat-lays |
| Channel & Luminosity Masking | Extracts all perforations simultaneously via pixel data | Sub-pixel, natural fiber softness | Full 8-bit alpha spectrum (0–255 opacity) | Lace, tulle, mesh, veils, chiffon, feathers |
For an in-depth breakdown of when to choose raster over vector workflows, read our comparison on clipping path vs. image masking.
How Professional Retouchers Mask Intricate Fabrics
Manual retouchers do not manually trace thousands of tiny lace holes with a mouse. Instead, they isolate the fabric using the underlying color and luminosity values embedded in the raw image channels.
- Isolating the High-Contrast Color Channel: The editor examines the Red, Green, and Blue color channels individually. In lace photography, one channel almost always displays starker contrast between the fabric threads and the background. That channel is duplicated to serve as a working matte.
- Dual-Layer Separation (Core vs. Sheer): A garment rarely consists entirely of transparent lace. Usually, there are solid silk linings, sturdy seams, and sheer lace overlays. Professional studios split the garment into two layers: a clean manual clipping path for the opaque body, and an advanced raster mask for the sheer overlays.
- Refining the Alpha Matte: Using careful Levels and Curves adjustments, the working channel is tuned so that the core threads reach pure white (255 = fully opaque) and the background reaches pure black (0 = fully transparent), while the delicate, semi-translucent fiber fringes retain intermediate grey values (alpha transparency).
- Color Decontamination: Any lingering bounce light from the original shoot is desaturated or color-corrected along the border threads, ensuring the cutout drops cleanly onto pure white, pitch black, or lifestyle composites without telltale halos. Similar transparency techniques apply when handling glass and transparent product cutouts.
5 Checks to Run on Delivered Lace & Mesh Cutouts Before Approving
Never approve a batch of delicate apparel cutouts based on tiny web gallery thumbnails. Run these five quick tests in your image viewer or editing software:
- 1. The High-Contrast Background Test: Place the transparent PNG over both a solid pure white background and a pitch-black background. A clean mask looks natural on both. If you see white powdery fringes on dark backgrounds or grey muddy edges on white backgrounds, color decontamination was skipped.
- 2. Inspect the "Closed Loops" at 200%: Zoom into the lace patterns. Look at the interior loops. Are the holes actually transparent, or did the editor leave solid grey filler inside the loops?
- 3. Edge Fiber Softness: The edge of a lace garment should look soft and organic. If the edge looks razor-sharp and straight like a cardboard cutout, it was chopped with a hard pen tool.
- 4. Hems and Scallops: Check the delicate scalloped edges of the lace trim. Over-aggressive contrast clipping often cuts off the delicate eyelash fringes that give luxury lace its texture.
- 5. Drop Shadow Realism: If your catalog requires a subtle drop shadow, ensure the shadow renders through the mesh perforations rather than creating a solid dark block behind the fabric.
Image Masking Pricing: What Does It Cost?
Because sheer fabrics require skilled manual channel separation rather than basic automated clipping, pricing scales with the density and complexity of the weave. Here is what professional e-commerce retouching typically costs on our dedicated image masking service:
| Masking Tier | Starting Price | Typical Fabric & Product Types | Turnaround & Revisions |
|---|---|---|---|
| Simple Masking | $0.59 / image | Basic coarse mesh panels, contained soft hems, single-layer cotton knit | 24–48 hours, 1 revision round |
| Medium Masking | $1.29 / image | Standard lingerie mesh, athletic sneaker uppers, chiffon blouses, loose fringe | 24–48 hours, 1 revision round |
| Complex Masking | $2.49 / image | Intricate floral lace gowns, multi-layered bridal veils, micro-mesh body suits | 24–48 hours, 1 revision round |
Illustrative Batch Example: Suppose you shoot a boutique collection of 50 bridal items consisting of 35 intricate lace veils and gowns (Complex at $2.49) and 15 chiffon shawls (Medium at $1.29). Your total editing investment comes to (35 × $2.49 = $87.15) + (15 × $1.29 = $19.35) = $106.50. For a full breakdown of rates across different apparel types, consult our image masking pricing guide.
Studio Shooting Tips to Lower Your Retouching Costs
You can drastically cut down post-production turnaround times and cost by shooting your delicate garments with post-production masking in mind:
- Shoot Against Maximum Contrast: If you are shooting black or navy lace, place it against clean white or pale grey. If you are shooting white bridal lace or ivory lingerie, shoot against a smooth medium grey backdrop. The greater the tonal difference between the fabric and background, the faster and cleaner the channel extraction will be.
- Eliminate Behind-Garment Shadows: Harsh shadows cast through lace onto the backdrop will blend directly into the weave. Move your background light source or place the backdrop further behind the mannequin to keep the background evenly illuminated.
- Keep the Aperture Closed (f/8 to f/11): Do not shoot macro lace details wide open at f/2.8. A shallow depth of field causes half the lace fibers to blur into the background, making it impossible for editors to distinguish intentional softness from background bleed.
Frequently Asked Questions
Can AI tools accurately cut out lace and mesh fabrics?
Most commercial 1-click AI tools struggle with intricate lace and micro-mesh. Because they lack true 8-bit alpha channel masking, they either treat fine holes as solid surfaces or blur the edges into unnatural halos. High-end e-commerce catalogs require manual channel masking to preserve natural transparency and micro-perforations.
Why do white lace cutouts look grey or dirty when placed on pure white?
This happens due to color contamination. When light shines through translucent lace fibers during photography, the original studio backdrop bounces color into the threads. If the editor does not manually decontaminate those edge pixels, that residual background tint shows up as a dull grey or colored fringe on clean white marketplaces.
What is the difference between image masking and a clipping path for lace?
A clipping path uses hard vector lines created with the Pen Tool, resulting in binary (opaque or deleted) edges that turn lace into stiff cardboard shapes. Image masking works at the pixel level using alpha channels, allowing thousands of intermediate opacity levels that keep fabric soft, translucent, and realistic.
What file format should I request for transparent lace images?
Always request 24-bit PNG files with alpha transparency for direct web upload, or layered PSD/TIFF files if your team plans to composite the cutout over custom lifestyle backgrounds or banners later.
How much does professional lace and mesh image masking cost?
Professional manual image masking typically ranges from $0.59 for simple mesh panels to $1.29 for standard apparel mesh, reaching $2.49 per image for complex, multi-layered bridal lace and intricate veils with 24 to 48-hour delivery.
Ready to see how clean your lace and mesh apparel can look on pure white? Test our hand-crafted masks before ordering: claim 2 free test images on our free trial or explore our full image masking service.
Tags
Ready to get your images edited?
Upload 2 photos for a free trial edit — returned in under 24 hours.
Start free trial →