The email says "batch delivered", you click the first thumbnail, and it looks fine. That is the moment most buyers approve a clipping path job, and it is the wrong moment. Thumbnails hide almost everything that matters: a bitten edge, a handle gap that was never opened, a pale rim that only shows on a dark banner. This guide is the review we would run ourselves if we were on the receiving end: six checks, a pass-or-revise table, and a way to sample a big batch without opening every file.
It is written for the person who receives the files. If you are the one fixing your own cutouts, start with our white halo fix guide instead.
Quick Answer: What to Check Before You Pay
- Outline: walk the whole edge at 200% for stair-steps and wobble.
- Edge position: flip between the original and the cutout and see whether the product got smaller.
- Holes: count every gap (handles, straps, slats) and confirm each one is open.
- Soft edges: find fur, mesh or glass that a hard path has chopped.
- The file itself: size, format, background and saved path, not the preview.
- The batch: line the images up and look for the odd one out.
Set Up the Review in Two Minutes
Keep the original and the delivered file side by side, with matching names. Open the delivered file in an editor, not a browser tab or phone gallery, because those apps can resample the image and smooth over the very edge you are trying to inspect. Put a solid mid-grey layer under the cutout so a leftover white or black background cannot hide. That is all the setup you need.
The Six Checks
1. Walk the Outline at 200%
Zoom to 200% and follow the edge all the way around, the way you would trace it with a finger. You are looking for three things. Stair-steps on a curve mean the path was drawn with too few anchor points or the edge was selected rather than traced. Wobble on a line that should be straight, like the top of a box or the base of a bottle, means the editor was rushing. Corners that have gone soft and round mean the path overshot the point instead of landing on it.
A good path looks boring. Curves run smoothly into each other, straight edges are straight, and you cannot tell where the editor started. If you can spot the start and end of the path, the edge is not finished.
2. Flip Between the Original and the Cutout
Edge position is the check that thumbnails never catch. Put the original on one layer and the cutout on another, then toggle the top one on and off at the same zoom. The product silhouette should not move. If it shrinks, the path sits inside the true edge and has bitten into the product: a trimmed sole, a clipped rim, half of a logo, a missing stitch line. If it grows, a thin strip of the old background has come along for the ride.
Do this on the corners and on any part with a thin edge, because that is where paths drift. Then drop the cutout on a dark colour and a bright colour to see whether a rim shows. The causes and the repair for that rim are covered in the halo guide, so you only need to spot it here and send it back.
3. Count the Holes
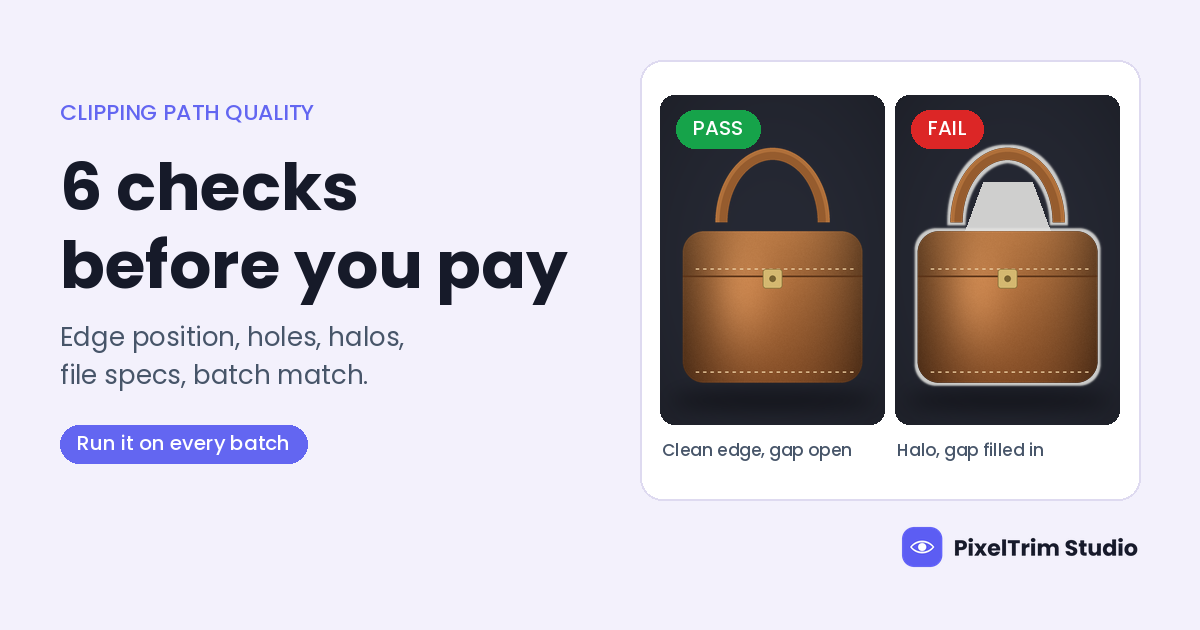
The holes check is the one that gets skipped most, because the outer outline looks perfect. Look at every enclosed gap: the space between a bag handle and the body, a strap loop, the gaps between chair slats, the opening of a ring, the space between laces. Each one needs its own inner path, and each one should show the new background through it.
The cover image of this post shows the typical miss. Same bag, same outer edge, but the gap under the handle was never opened, so a grey wedge of the old background sits where the new background should be. Count the gaps in the original, count them in the delivery, and the numbers must match. A product with several parts and gaps may be quoted as multi clipping path work, so ask how many paths were drawn.
4. Look for Soft Edges a Hard Path Has Chopped
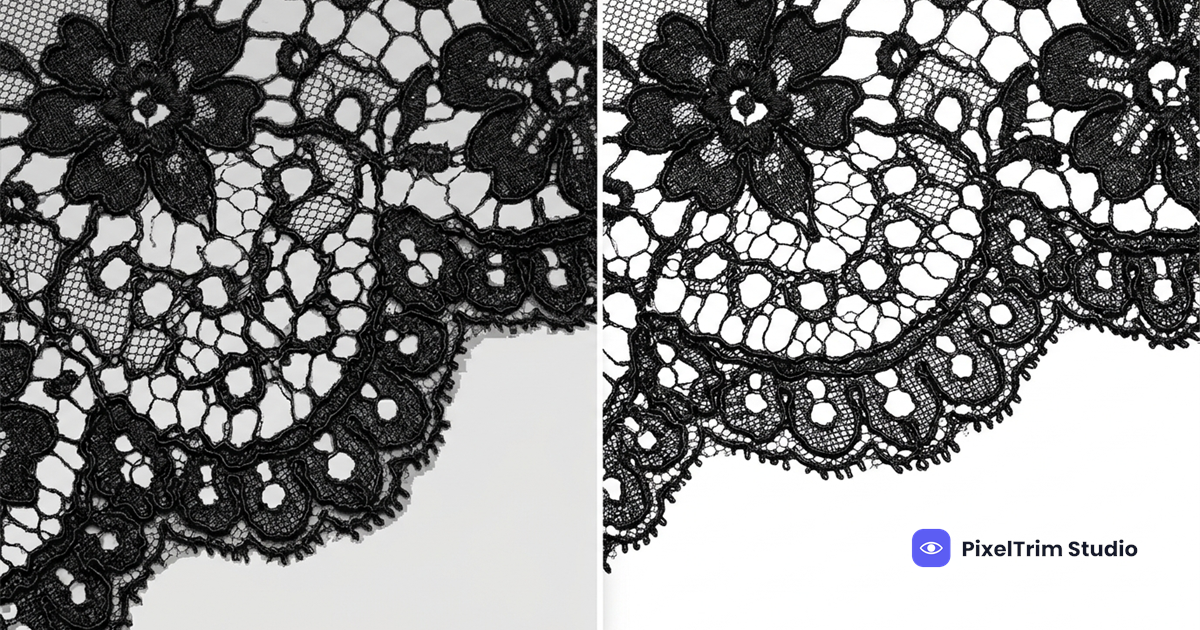
A clipping path is a hard line, and that is the right tool for solid objects. It is the wrong tool for fur, hair, loose fringe, mesh, veils and glass. On those, a path produces a cutout that looks cut with scissors: flat, slightly jagged, with fine strands sliced off. If your product has any of those edges and the delivery looks too hard, the problem is the technique, not the editor's care. The fix is masking for those areas, and the two often work together on one image. Our guide to clipping path vs image masking shows how to tell which edge needs which.
5. Open the File, Not the Preview
Now check the deliverable against what you ordered. A short list is enough:
- Pixel dimensions match the original unless you asked for a resize.
- Format and background are what you specified: pure white JPG, transparent PNG, or layered PSD.
- Transparent files are really transparent. A checkerboard pattern baked into the image, instead of real transparency, can slip through, so place the file on a colour and see.
- The saved path is present if you asked for a PSD or TIFF with the path included. Open the Paths panel and look for it by name.
- Colour looks the same as the original. A cutout should not change the product colour unless a correction was part of the order.
- File names follow your naming pattern, so they load into your catalog without renaming.
If a marketplace needs a pure white background, read the value with a colour picker rather than trusting your eyes. Off-white passes a glance and fails an upload.
6. Line the Batch Up
The last check is the one you can only do on a batch. Put a dozen delivered images on one canvas, or into a contact sheet, at the same zoom. A clean batch looks like it came from one hand: the same edge sharpness, the same distance from the frame, the same treatment of similar parts. The odd image jumps out in seconds. If three bags have open handle gaps and the fourth does not, you have found a miss without zooming into a single pixel.
Pass, Revise or Reject?
| What you find | Verdict | What to ask for |
|---|---|---|
| Smooth edge, product size unchanged, all gaps open | Pass | Approve the image |
| One or two stair-steps or a faint rim in a few images | Revise | Redraw those sections, same file |
| A gap or hole left filled in | Revise | Open the named gap with its own inner path |
| Product visibly smaller or logo clipped | Revise | Redo the path on the true edge |
| Fur, mesh or glass cut with a hard line | Re-scope | Switch those areas to masking, with a quote if the tier changes |
| Wrong size, format or colour across the batch | Reject the batch | Redeliver to the written spec |
| Same fault repeating in most images | Stop and talk | Agree the cause before more images go in |
How to Ask for a Revision So It Lands
- Name the file and the area, for example "bag-014, left handle gap".
- Attach a screenshot at 200% with a circle or arrow on the problem.
- Say what you expect, not just what is wrong: "gap open to new background", "edge on the true outline".
- Send one message per batch, with every note in it, rather than a trickle of single complaints.
- Check the revision policy before you order. Ours is one free revision, so a clear first note saves you the round.
If you are still choosing who to send work to, our clipping path service guide covers what a provider should include and how to compare them.
How Much of a Big Batch Should You Check?
You do not need to open every file in a big delivery. A practical rule: check every complex image, then every fifth image of the rest. Here is a worked example, our own illustration and not a quote, using our three tiers for a 200-image catalog.
| Group | Images | Rate | Cost | You check |
|---|---|---|---|---|
| Simple (boxes, bottles) | 120 | $0.39 | $46.80 | every 5th: 24 |
| Medium (bags, handles) | 60 | $0.69 | $41.40 | every 5th: 12 |
| Complex (jewelry, chairs) | 20 | $0.99 | $19.80 | all 20 |
| Total | 200 | $108.00 | 56 images |
That is 56 images instead of 200. If the sample shows a repeating fault, widen the check to the whole group. If it is clean, approve the batch.
What a Clean Delivery Costs
Quality is not what makes a cutout expensive. Complexity is. These are PixelTrim's current per-image rates for manual work, delivered in 24 to 48 hours with one free revision:
| Tier | Price | What fits |
|---|---|---|
| Simple | $0.39 / image | Plain product, solid edges |
| Medium | $0.69 / image | Handles, straps, a few holes |
| Complex | $0.99 / image | Jewelry, footwear, furniture with gaps |
For what moves a quote up or down, see our clipping path pricing guide, and for how the same pen-tool work is sold under other names, read about the deep etching service.
Want to run these six checks on real files? Send two images for a free trial edit and review them with this list. You can also see the clipping path service page for what each order includes.
Frequently Asked Questions
How do I check the quality of a clipping path?
Open the delivered file in an editor, zoom to 200% and follow the full outline for stair-steps and wobble. Toggle against the original to see whether the product shrank, count every hole, and confirm the file size, format and background match your order.
What are the signs of a bad clipping path?
Jagged or wobbly edges, a product that looks smaller than the original, a pale rim on dark backgrounds, gaps that are still filled with the old background, and soft edges such as fur or mesh that look chopped off.
Should I check every image in a large batch?
Not necessarily. Check every complex image and a sample of the rest, for example every fifth file. If the sample shows a repeating fault, check the whole group before you approve.
What should I do if the delivered cutouts are not good enough?
Send one message listing the file names, with a 200% screenshot and a short note on what you expect for each. Check the provider's revision policy first, since some include a free round and some charge for each one.
Does a clipping path work for hair, fur or glass?
Not on its own. A path is a hard line, so it cuts through fine strands and see-through edges. Those areas need image masking, and many products need a path and a mask together.
Tags
Ready to get your images edited?
Upload 2 photos for a free trial edit — returned in under 24 hours.
Start free trial →